In this lesson we learned how to texture within Maya by using PhotoShop
we was given a full tutorial on how to add the textures to follow during the lesson.
we where also given textures to edit within Photoshop but we could also add our own textures from the internet. within Photoshop we added effects to make certain textures look more 3D such as darkening the rusty metal rings of the barrel and giving it a drop shadow.
then saving the texture as a TGA files that you import into Maya and add them as materials. I then repeated this to add the rest of the textures as you see above, this was one of my favorite lessons as it was easy to learn if i was to do this again i would add more effects on the textures to make them fit into the scene better.

(not my image above)
this lesson we learned to use the style of Pixel art which has been a popular modernist art style that started (to grow more popular) on the internet in the early to late 90's and is constantly growing in popularity and is now a theme in modern video games from a flat 2D style or a more isometric view like the image above.
in this lesson we learned to draw Pixel art in the isometric view to practice we started with cubes using lines within Photoshop to add curves we would have to add dots manually.
we where then given a fire hydrant to turn into a piece of Pixel art, to start i got the outline done which used a mix of lines and manual dots and circle outlines. then started to add color.
then when I finished with the overall base color (red) i then started to add a lighter shade of red to add a level of depth and i would like to add more to this and expand on this to create a little Pixel scene.
in this lesson we learn about anthropomorphism which is mixing human elements with human elements to create an human animal hybrid. We were tasked in designing our own hybrid using a frog
so after looking for images for frogs to use for reference i designed 3 different rough ideas for what i wanted in the end i chose the fighter frog as it coveys a mix of animal and human.
i then went and finalized the design adding color and shading if i was to go back to this as i was not happy with the final design as i felt it was lacking. i would add a background and more detail to become more realistic and darken the image using more effects and levels.
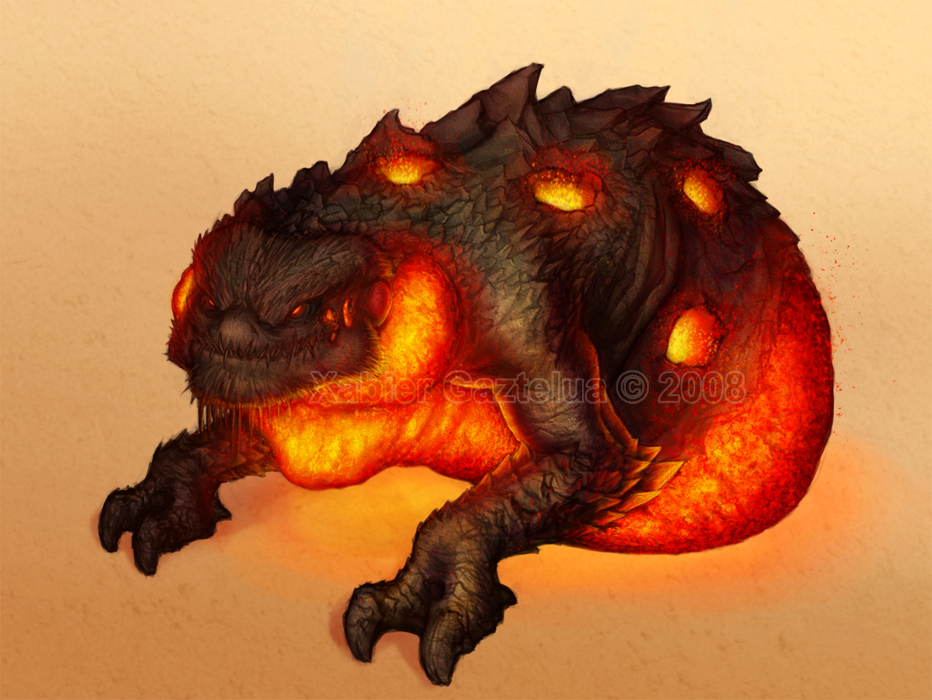
in this lesson we where shown a playlist of videos showing masking layers in photoshop and adding color and textures to the image and melding to the image to make it look more realistic. we where given a pre drawn image (above) to draw over.
i first added a mask layer to keep all of the colors on the lizard and not going on the background.
i started then adding color to the image i went for a traditional lizard color of green.
i started then working on the head to give the character a scale like texture.
this is as far as i got, it is incomplete but i would go back to this and start again to add more textures and meld them together with effects to get a more grounded character.

in this lesson we where tasked with modelling the USS Enterprise from Star Trek using a plane base diagram to get the dimensions accurate using box modelling if i was to go back to this i would add much more detail with extruding and more textures as modelling is not my strong point i would like to get better.
in this lesson we learned about Mudbox and how that can be used for texturing and adding more detail to a model such as a dinosaur model like the one above.
after having a trail run with Mudbox we started adding effects to the T Rex i.e making scales on the skin and indenting where the eyes and mouth would be having an almost Photoshop feel as this is all done with a sudo paint brush tool and stencils.
i then started messing with the model pulling certain parts to come out to look like muscle and excess skin. i would like to come back to this as i don't think my dinosaur looked good as i was more just testing the functions within MudBox to see what i could achieve and now being more familiar with the program i could design a better looking model.